
This quick start guide will show you how to install and begin using FlashStats 2005.
To install FlashStats, simply open the FlashStats2005.msi file and follow the prompts.
To run the FlashStats program, click on the Windows Start button, choose All Programs, choose Maximized Software, and then choose FlashStats 2005.
FlashStats can analyze the log files for any number of different web sites.You need to define each web site within FlashStats so that it knows the name of the web site, its home page URL, the location of the log files, and so on.
To define your first web site, open the FlashStats Web site menu and choose New.... Fill in the full URL to the home page of your web site in the first field.
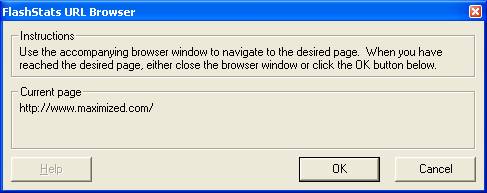
Tip: FlashStats provides an advanced way to specify certain values such as URLs. You can click the Use Browser... button to have FlashStats display an Internet Explorer window which you can then use to navigate to the desired page. (You can use all of IE's features, such as bookmarks, to select the desired page.) Once you have navigated IE to the desired page, you can either close the IE window or click the OK button in the FlashStats URL Browser (shown below). FlashStats will insert the URL of the current page into the appropriate field.
Next, enter the name of your web site. This name will appear at the top of the reports that FlashStats generates.
Next, enter the file name of the home page within each directory (folder) on your web site. You can either select one of the common values from the given list, or enter your own value.
Finally, select a folder on your hard disk where FlashStats will save reports. You can click the Auto-select button to have FlashStats suggest a location for you.
You probably don't need to change any values on the File Types or Special Paths tabs right now, so you're all done with this window. Click OK to close the window and save your values.
Look along the left-hand side of the FlashStats window and you'll see a button bar where you can select among the different views available within FlashStats. (You can also choose a view from the View menu.) You'll see that FlashStats has automatically selected the Log files view. This is where is you define the location of the log files for your web site.
Click the Add Log Set... button to begin the process of defining a log set. FlashStats will display a wizard to walk you through the process of defining the log set.
FlashStats supports both local and remote log files. Please follow the steps appropriate for your setup.
If you have local, direct access to the log files then choose the first option ("Local files") then click the Next button.
Next, specify the location of the log files, then click the Finish button. That's all you have to do!
If the web site's log files need to be downloaded from the web server, then choose the second option ("Downloaded from web server") then click the Next button.
Next, you need to specify the information necessary for downloading the log files. Provide the necessary values for this step of the wizard. You may want to click the Use Browser... button to display an Internet Explorer window to help navigate to the location of your log files. (Note that IE can navigate through FTP servers.) If your web server requires special settings to access its log files then you may need to click the Edit All BitKinex Settings... button. When you have provided the necessary values in this window, click the Next button.
In the final step of the wizard, FlashStats needs to know where it should store local copies of the log files that it downloads. Specify a folder, or click the Auto-Select button to have FlashStats suggest a location. Finally, click the Finish button.
FlashStats will now ask for approval to download the log files. This may take a while, especially if you have a lot of large files.
Finally, FlashStats will scan all of the local files to see what date ranges they include.
You're done setting up your first web site within FlashStats! You are ready to run your first report.
Click the New report view in the View bar at the left of the FlashStats window. The New report view has three tabs where you can specify the desired report options. For the first report you'll just select the desired date range and a few options.
Select the range of dates that you would like to include in your first report. You can click and drag across a range of dates in the calendar, or use the From and To fields to choose the starting and ending date.
In the Advanced Options group, make sure that the first two options (Perform DNS Lookups and Show Query Strings) are unchecked, and that Create Charts is checked.
That's all you need to do! Finally, click on the Create reports! button and FlashStats will analyze your logs and create your first reports. After the reports have been created FlashStats will automatically launch a browser window to display the Summary Data report. You can use the drop-down menus within each report to view different reports.
Now that you have successfully run your first reports, feel free to explore all the features of FlashStats. In particular, you may want to check out the new filter capabilities. Also, be sure to read the beta notes for details on limits in beta 1.